Arborvitae are one of the best and most versatile plants. Their pyramid shape is iconic and creates a look that stands out. They are the perfect plant because of how hardy and resilient they are while also being ornamental and attractive. Arborvitae can be used for so many things, from decoration to living fence to windbreak.
Growing an arborvitae to meet your needs starts on the first day they are planted. Planting an arborvitae correctly depends on how you plan to use it. It is important to follow some simple guidelines when planting an arborvitae, but the results are worth it! This blog post provides a simple guide to planting arborvitae to ensure your plant thrives.

As you prepare to plant your arborvitae, consider the following tips.
Where to Plant Arborvitae
Arborvitae do best in USDA hardiness zones 2-7. This means they thrive anywhere North of Dallas and well into Canada. Most places are ideal for arborvitae and this, combined with their versatility, makes them the right choice for so many landscapes.
How much sunlight do arborvitae need? Plant arborvitaes in full sun or partial shade. They like sunshine, and arborvitae may struggle if they receive sunlight for less than half the day.
Plant arborvitae in proper soil. They do best in soil that drains well and is free of rocks, clods, and large weeds or trees that will compete with them for water. They are quite resistant to most threats, but they can suffer in very dry conditions, so avoiding locations that experience dry and hot winds is wise, unless additional measures are taken to assure that water is available to the roots.
What about spacing arborvitae? A common question is how much space between arborvitae is enough? Plant arborvitae far enough apart to accommodate for their full size. A mature arborvitae can be ten feet wide, so planting them ten feet apart is wise. If you plan to prune the plant to maintain a certain size or shape, keep that in mind when spacing arborvitae.

They can grow quite tall, so avoid planting arborvitae under power lines or other overhanging structures. Usually, planting them closer than ten feet to a permanent structure is not a good idea. They will require annual pruning and care otherwise. Lastly, they will compete with other trees for soil nutrients and water. Therefore, keeping them roughly 20 feet from other large greens is wise. If you plan on arborvitae growing into a hedge, you will want to consider your final look and space them closer.
Remember, they will merge together so leave space as they grow into a hedge.
When to Plant Arborvitae
The best time to plant arborvitae is in the early spring. This gives the arborvitae plenty of time to establish its roots and new growth before the winter.
Plant arborvitae in early spring for best results. Early spring is the best time to plant arborvitae because the ground will have warmed and thawed enough to be easily worked with hand tools and receive the plant. Another reason this is the best time to plant arborvitae is because they have not yet started the bulk of their growing for the year in early spring.
Some people wonder if it is ok to plant arborvitaes in fall. It can be ok to plant arborvitae in the fall in some situations. The roots will not be as established for the harsh winter, but they will also not have to endure the hottest parts of the summer. If you are further south, planting in fall can be a good idea, especially if you might not be as consistent with watering. If you live further north, then planting arborvitae in the fall might not be as good of an idea, though it can still work.
How to Plant Arborvitae
Now that you know when to plant your arborvitae, it is time to talk about how to plant arborvitae correctly.
Arborvitae typically come with the root ball in a burlap sack or in a plastic pot. Planting a tree in a burlap bag involves carefully removing as much burlap (and wire, if present) as possible. Remove these right before planting. To remove the roots from a plastic pot, turn the plant onto its side and gently pull the container off. You may need to use small cuts starting at the top of the container and working down if it won’t come off with gentle, constant effort.
Step 1 - Pick your location based on the information above about where to plant arborvitae. Think about how your location will be in the summer and in the winter. In the summer you will benefit from blocking the sun and enjoying the breeze. In the winter you want to let as much sun to your house as possible and block the cold North winds.
Step 2 - Save the dirt! You will want to add much of it back into the hole, so make sure it is accessible as you dig.
Step 3 - Dig as deeply as the container is tall. Don’t dig as deep as the dirt level, but as deep as the container. Make every effort to make the bottom smooth and uniform. You do not want jagged areas where air pockets could form under the roots. You want as much contact between the root ball and the ground as possible. Some suggest digger slightly to deep and then adding finely ground soil to the bottom.
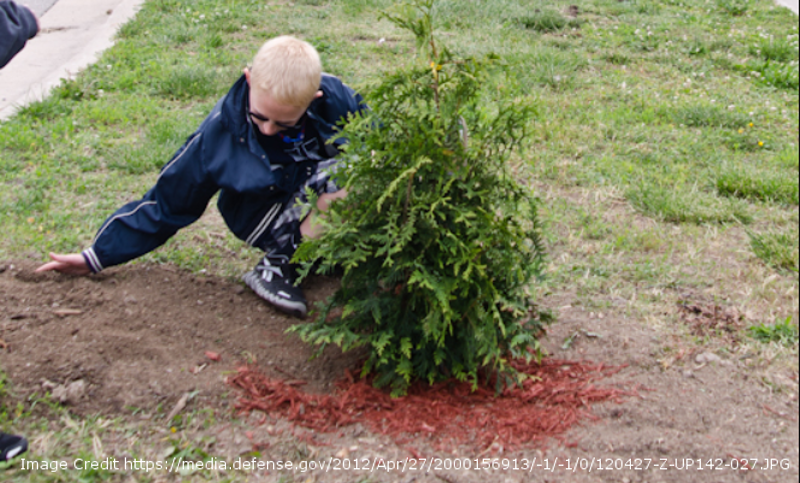
Step 4 - Double as wide as the container is the correct width for the hole. After the hole is dug, put the arborvitae in. Fill up the open space around it about halfway up. Water it a lot! Then add in the rest of the dirt to fill in the top half of the space around your arborvitae. Again, water this added backfill a lot. You want the dirt you added back in to settle into the hole and compact the root ball in solidly.
Step 5 - Anchor the arborvitae North and South. Measure the distance from the arborvitae to the edge of the hole you dug. Double that length and put your stakes in that far away from the tree. Use something flexible and thin around the tree and take care not to block any branches or prevent growth with your anchor.
Arborvitae Planting and Watering Tips
-
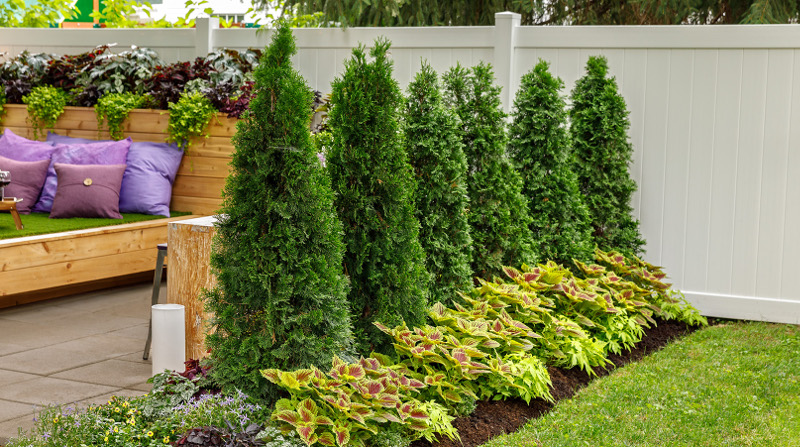
Plant arborvitae closer together to form a fence. Arborvitae provide privacy when you use them to form a fence.
-
Plant arborvitae on the north side of your property form a windbreak in the winter.
-
Plant arborvitae on the south or west side of your property to create shady areas in the summer.
-
Dig as deep as the container and double as wide. Save the dirt.
-
Spacing arborvitae is important. Consider how big they will be, not how big they are when you plant them.
-
Arborvitaes grow in containers. You can plant arborvitae in a large container and it may require pruning to maintain its size.
-
Arborvitae need roughly 2-3 gallons of water per week, which is about 1-2 inches of rain. Apply more when first planting to help
-
Add large amounts of water slowly and then let the water soak downward before water again. This helps draw the roots into the ground.
-
If the soil around the root ball is dry at 1 inch below the surface you should add more water.
How To Transplant Arborvitae
When transplanting arborvitae, follow the same instructions as above. However, there are some other considerations to think about when moving the plants. It should be done in the spring or fall if possible. This gives the plants the best chance at acclimating into their new location. That is because the ground is still warm and the air temperatures are starting to be cooler, which encourages the plant to put energy towards growing roots.
In order to transplant the shrub or tree, be sure to dig a very deep hole around the plant. It is important to not damage any of the roots if possible. Make sure the new hole you dig is larger than the root ball. Place the new plant in the hole and fill in with dirt. Push down around the plant to squeeze out any air pockets. Water frequently after you transplant to reduce stress.
Tips To Lessen the Shock of Transplanting Arborvitae
-water the plant the day before digging the plant out
-dig the hole a day in advance and water the hole to soften the soil ahead of time
-plant on an overcast day or during cooler evening hours
-larger arborvitae that are 15+ feet tall need a root ball of at least 3 feet in diameter
-water twice a day until it becomes established, especially during hotter days
 |
Author Chris Link - Published 12-13-2019 |


