If you have a little space outdoors and no space indoors, winter sowing is a perfect solution for you! Basically, you are helping seeds to get a jump start on the growing season by taking advantage of the natural cycles of the seasons. You will literally plant your seeds in snow, and your seeds will germinate at the exact time they are supposed to, with little help from you.
What is Winter Sowing?
Winter Sowing is seed starting without the window space. If you lack window space, the answer for you may be winter sowing. You basically pick seeds that will work (more on that below), sow them in a flat or recyclables (such as yogurt cups or milk jugs with the tops cut off) and let nature have its way with them. They sit outside frozen in the snow until everything starts warming up. The seeds germinate in their containers and you don't have to ease them outside like you do with traditional indoor started seedlings. They are already used to the outdoor weather. It's genius.
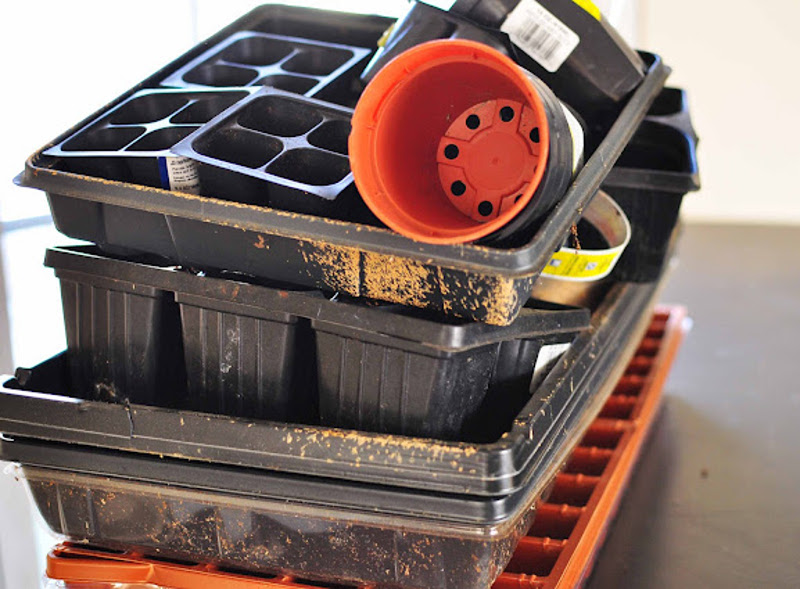
Moving on...start with your container. You can poke holes in the bottom of any plastic container and it will work! There are also versions you can buy from the store specifically designed for sowing seeds.

Second, you will need some soil or a soiless base. These pellets were included with the flats and are little peat dehydrated munchkins. You can buy these (they are fairly cheap) or buy potting soil. If you have compost, you can use that too, but you might get other seeds growing that you weren't expecting. It is up to you how in depth you go. If you are just messing around and trying this for the first time, get an empty sour cream container (cleaned!), fill it with dirt and use a seed like coneflower. You'll be good to go!

The next step is simple. Put soil or a peat pellet in each little slot, or fill up all your recyclables with soil.

Now, add water...gently please! Those munchkins will start to float! Make sure you are working over a sink or have a drainage tray under your flats or else you will get water everywhere :)


The pellets will poof up like little mountains. Keep watering until they are all puffy and a dark brown color like the photo above.
If you get tired of being gentle with your watering, feel free to use your kitchen sprayer, but beware, you might get wet :)

Once everything is thoroughly soaked, run your hand over the top of the tray to even out all the soil. Your try will look like this:

Wait several hours (or days) until the soil is wet, but not sopping and the soil is all about the same level in its "slots". When your soil is ready, it is time to begin the fun part - choosing seeds!
How to Winter Sow Seeds
When a seed packet says the seeds need pre-chilling or "stratification", that is a good sign that they will do well under winter sowing conditions. The process or chilling and soaking that gardeners do indoors is completed by the natural thawing and freezing outdoors (the way nature does it!). Sweet peas are a good example of this kind of seed.

Another good sign that your seeds are good candidates for winter sowing is if the seed packet mentions the seed "self-sowing" or colonizing. This means the plant naturally drops its seeds in fall and will sprout in the spring easily. Coneflowers, cosmos and poppies are good examples of this kind of seed.
Poppy seeds are teensy tiny, so when you work with tiny seeds like this, gently lay them out on a plate, use your finger to pick them up and simply drop it onto the soil.

Label your flats by vertical row, but one of the most important things to do while winter sowing is to make a very simple cheat sheet to remember what is what. Also sow seeds in groups based on whether you know what the seedlings look like. For example, nasturtium have distinctive lily pad-like leaves. When they pop up, you know exactly what they are and also have a separation between two other plants that look more similar when they first emerge (poppies and hollyhock).
Now comes the fun part. Take that tray outside and plop it down in the snow. You will feel like you are insane and killing all your seedies, but you aren't...relax!

Toss some snow right on top. Gently.
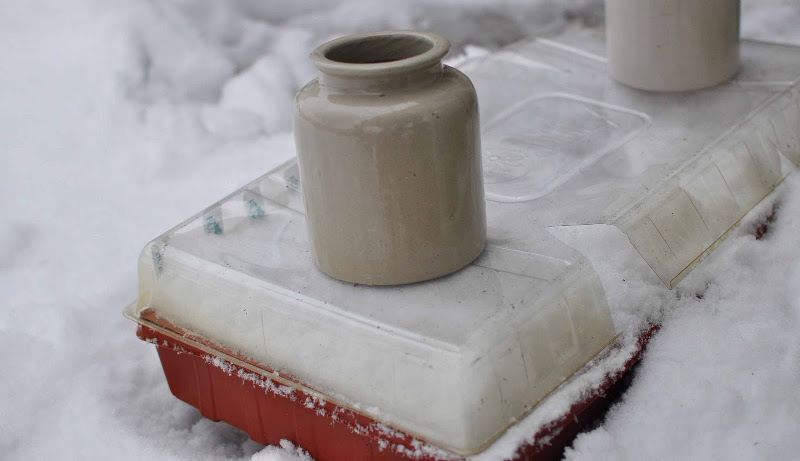
After you have the whole thing covered in snow, place your top on. This flat came with a clear lid, but plastic wrap will work as long as you are careful. Make sure you put holes in the top to vent. When seedlings emerge, slowly remove the plastic. The biggest problem with winter sowing is that you can cook the seedlings by not providing enough air circulation.

Does all that snow scare you? It shouldn't. That's the way seeds sleep in the natural world. Under a nice bed of snow. They will freeze and then thaw with a nice long watering from that snow. Once it warms up enough, the seeds will know exactly when to germinate and you have saved yourself 2 square feet of window space in your home!
We recommend weighing your containers down (like above with those jars)...because you don't want everything blowing down the street.
Best Seeds For Winter Sowing
When a seed packet says the seeds need pre-chilling or "stratification", that is a good sign that they will do well under winter sowing conditions. The process or chilling and soaking that gardeners do indoors is completed by the natural thawing and freezing outdoors (the way nature does it!). For your further information, other phrases that are good signs for winter sowing include: "can be direct sown early" "sow outdoors early in Spring" and "can withstand frost".
Another good sign that your seeds are good candidates for winter sowing is if the seed packet mentions the seed "self-sowing" or colonizing. This means the plant naturally drops its seeds in fall and will sprout in the spring easily.
- Sweet peas
- Coneflowers
- Cosmos
- Poppies
- Nasturtiums
- Hollyhock
- Sunflowers
- Nigella
- Dill
- Lemon Balm
Let us know what other seeds you like to winter sow at the end of this article, and we'll add it to our list!
Winter Sowing Tips - The Free Way
When you have larger seeds, you have to plant them a little deeper, so use your finger, an unsharpened pencil or a dipper to make an indentation into the soil, place the seed in and then cover the seed with soil. It's not really that scientific. If you want to, you can just place the seed on top of the soil, give it a good push a 1/2 inch or so into the soil and brush soil back over the top.
- Save your berry containers and your doggy bag plasticware
- Label flats by vertical row
- Make a cheat sheet to remember what is what
- Weigh down your containers to help with the wind
- Cover with snow for moisture and added protection
- Bury larger seeds deeper than smaller seeds
Bonus Tip: Do you want to know the most perfect accessory for winter sowing? A Rotisserie Chicken. We're not kidding...the packing is incredible for plants. The bottom is dark so it provides warmth to the soil, the clear plastic top serves as a greenhouse, inviting condensation and warmth. The greatest advantage to the chicken container though is its height. It is tall enough to allow seedlings to get a little taller and allows more air circulation so tiny plants don't suffocate and die.
Do you have any creative ideas for winter sowing containers? Let us know below!
 |
Author Chris Link - Published 10-19-2021 |


