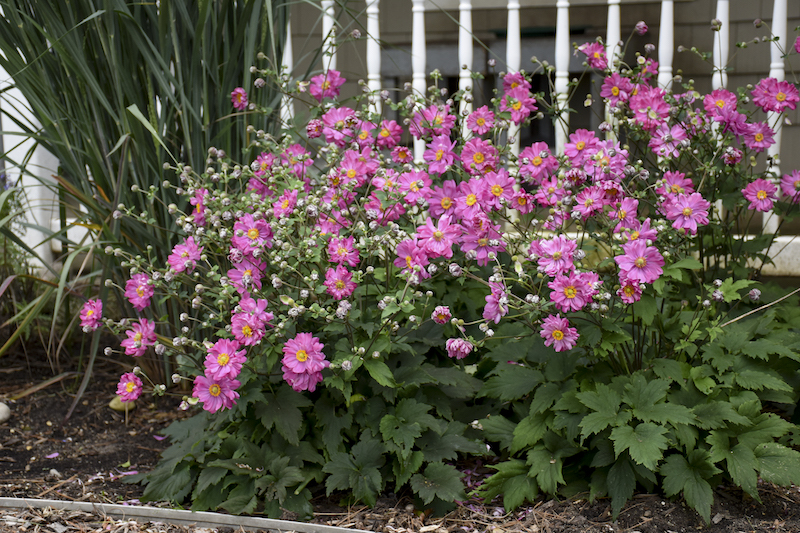
Windflowers are a colorful group of perennial poppy-like flowers whose light petals dance in the breeze. Belonging to the family Ranunculaceae, Anemone blanda are also commonly known as Anemone. Windflowers either bloom in the spring or fall and can range in height from 6 inches to 4 feet tall. Grown from tuber-like rhizomes named corms, it is best to plant spring bloomers in the fall before the first freeze, and plant fall bloomers in the spring.

What You Need To Plant Windflowers
- Shovel
- Compost, leaf mold, or other organic matter
- Garden spade
- Good location
- Water source
- Mulch
Where to Plant Windflowers
Windflowers require a minimum of four hours of bright and direct light, but their sensitivity to heat may dictate how much sunlight is best. In warmer climates, selecting a site with partial sun (providing shade in the heat of the afternoon) will help your windflowers tolerate the heat. In cooler climates, full sun will allow your windflowers to thrive. However, always double-check the variety you are planting; some windflowers (particularly Japanese varieties) may prefer partial shade.
Windflowers are not overly picky when it comes to soil, but they do best in slightly acidic soil. Overall, the best site you can provide is a moist, well-draining area that has been improved with compost or other organic matter. Plant windflower root clumps/corms approximately 2 inches deep, and avoid excess moisture to ensure no issues with rot.

Windflower Spacing
Typically windflowers should be planted in groups to create attractive drifts in your landscaping. Clusters should be spaced 16-18 inches apart, but there is some variation between varieties. Windflowers may spread minimally by sprouting new plants from the original corm/root clump, but by dividing the root every two to three years, you can rejuvenate your windflowers and ensure they remain in their desired location.

Steps To Plant Windflowers
Before you plant windflowers, it is important to prepare the corms/root clumps by soaking them overnight or at least 12 hours to ensure the plants are hydrated and prepared to start growing. Once your corms are ready for planting and you have selected the ideal location for windflowers, start site preparation by loosening approximately a square foot area of soil at least 6 inches deep.
Windflowers prefer soil high in organic matter, so it is important to add a shovelful of compost, leaf mold, or other organic matter. If you choose to add bulb fertilizer or bone meal to your soil to promote healthy roots, add it prior to mixing the organic matter with the soil. If the soil in your selected site is poorly draining, adding a shovel of landscape sand or pea gravel is recommended to promote drainage.
After your soil has been prepared, dig small planting holes in a cluster with holes 2-3 inches apart and 2 inches deep. There is no limit to the number of windflowers that can be planted in a cluster; instead, select the cluster size that compliments the surrounding landscape. There is no correct orientation for corms, so don’t worry about locating a specific top or bottom. Simply place one in each hole, cover the corm, and gently tamp the soil. After the whole cluster of corms is planted, lightly water the area.
Step 1 - Select a good location
Step 2 - Soak the corms/root clumps
Step 3 - Prepare the site by loosening the soil
Step 4 - Add organic matter and fertilizer or sand if desired
Step 5 - Mix the soil and amendments
Step 6 - Dig holes for corms/root clumps in clusters 2-3 inches apart
Step 7 - Place a corm/root clump in each hole 2 inches deep
Step 8 - Fill the holes and gently tamp the soil
Step 9 - Lightly water the area after all corms/root clumps in the clump are planted
When to Plant Windflowers
The best time to plant windflowers is dependent upon the variety. Spring-flowering varieties should be planted in the fall before the first freeze. Spring-flowering windflowers rely upon snow and spring rains to grow. If the winter is dry, make sure to check the soil moisture and water the corms/root clumps as needed. In colder climates, providing a layer of mulch is recommended to protect against freezing temperatures.
Fall-flowering varieties should be planted in the spring after the last typical frost. As spring windflowers emerge, it is best to assess the landscape and select sites for fall-flowering varieties that will complement the spring varieties and provide a continuous supply of flowers.
Although it is typical to directly plant windflower corms/root clumps in the soil, fall-flowering varieties can be pre-sprouted if desired to promote earlier flowering (typically a couple weeks ahead of ground planting). To pre-sprout corms, simply soak and place the corms in a seed tray with potting soil a couple weeks before the last typical frost.
Transplanting Windflowers
Due to the spreading nature of windflowers, corms/root clumps should be dug up and split every 2-3 years to rejuvenate the plants and reduce crowding. Once the foliage begins to die back, start by digging up the corms/root clumps. If your variety has corms, break off any new corms from the original/main corm. If your variety has rhizomatous roots (identified by sections that each have an individual segment of crown), use a sharp knife to separate each segment.
Windflowers can either be replanted immediately after division or stored in a cool, dry place over winter for planting the next spring/fall. To ensure proper storage, dry corms/root clumps for 10-14 days in a warm, dry location away from direct sunlight. Once dried, store the corms/root clumps in peat moss, perlite, or vermiculite.
In colder climates where winters might kill overwintering corms/root clumps, fall-flowering windflowers can still be incorporated into gardens and landscapes. After flowering and the die-back of foliage (but before the first frost), simply dig up the windflowers and store overwinter similar to propagated plants.
 |
Author Chris Link - Published 07-21-2022 |
