Propagating daylilies is easy and not only provides more plants for your garden, but also improves the vigor and blooming quality of long-established plants. Division and seed saving are the two most common ways to expand your stock of daylilies. Dividing the plant into smaller clumps ensures that each plant will be a genetic clone of the parent. Beginners and experienced gardeners alike can successfully divide daylilies every 3-4 years. Plants grown from seed may differ from the parent, depending on if the parent plant is a hybrid cultivar or if cross-fertilization with another plant occurred.

Image courtesy of @daylily1976
Methods To Propagate Daylily
The two most common ways to propagate daylilies are division of the root base and seed germination. Professional growers also use more advanced techniques like root cuttings or tissue culture cloning to replicate plants quickly. In the home garden, the easiest way to expand your daylilies is to dig up the plant and divide the root system into smaller plants. To introduce more variety into your collection, you can save seeds at the end of the summer and plant them in spring, although some varieties may take many years to bloom.
What You Need To Propagate Daylily
No specialized tools are needed for propagating daylilies by division or seed.
For division: use a garden fork or a long-handled transplanting spade to dig up as much of the root ball as possible. A folding garden saw or hori hori knife is useful for cutting through large roots and separating the plant crown into sections. Make sure the new plants will have access to water after replanting.
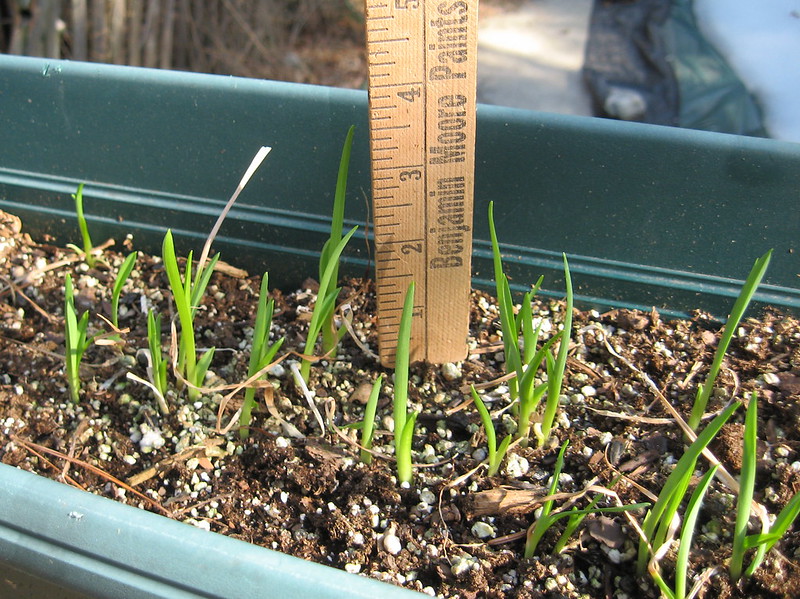
For seeds: save the seeds in a paper bag or envelope and store them in a dry, dark place. When you are ready to start them, fill shallow flats or individual 3-4 inch pots with an all-purpose potting soil. Unlike starting vegetable seeds, no special seed starting mix is needed. Apply a light layer of perlite over the planted seeds to prevent fungal diseases like damping off after germination. If you start the seeds late in the spring, heat mats and supplemental lighting are not necessary. An unheated greenhouse or cold frame is perfect for overwintering and stratifying the seeds in preparation for spring germination.

Photo by Tauralbus, cropped, Flickr, Copyright CC BY 2.0 DEED
Best Time To Propagate Daylily
The best times to divide daylilies are in early spring just as the growth begins or late in the summer after blooming has ended for the season. Newly separated plants need to be replanted as quickly as possible and will need at least 4-6 weeks to establish before they go dormant in the winter. Regular watering will be required until new foliage begins to grow from the crown of the plant.
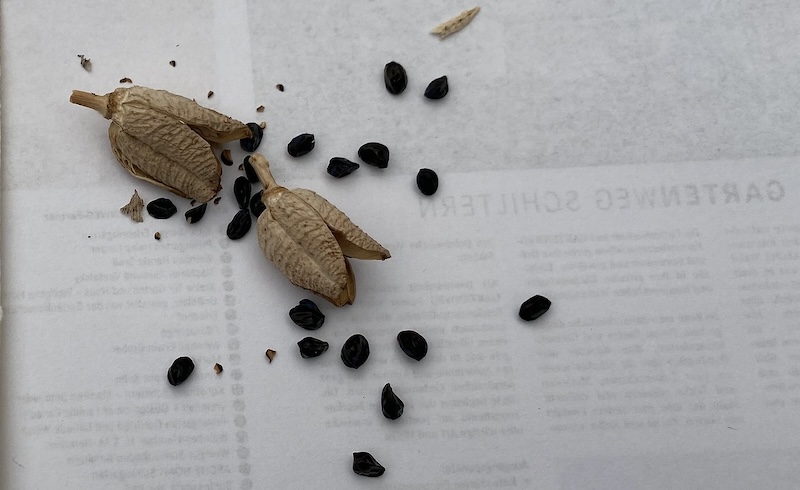
The seed pods of daylilies form at the end of summer after the flowers have been pollinated. Collect them as they turn brown and dry. They will crack open when the seed is dry enough to store. Place the seeds and pod in an envelope or brown paper bag if you wish to store the seeds or share them with friends. Otherwise, it is best to sow fresh seeds in flats or small pots and place them in an unheated greenhouse or cold frame where they can spend the winter. Cold stratification is needed for at least 6 weeks to prepare the seeds to germinate as the soil warms in the spring. If you would like to grow the seeds during the summer, place the seeds in a refrigerator for 6 weeks before sowing.
Steps To Propagate Daylily
Division is the quickest and easiest way to multiply your stock of daylilies. Before you begin, decide where to transplant the new plants and what to do with any extra plants. Follow the steps below for dividing daylilies with the best results.
Step 1 - Dig up the plant, keeping as much of the rootball intact as possible.
Step 2 - Cut back the top growth by at least half so you can see where to divide the plant. Less foliage also helps the plant establish more quickly after transplant.
Step 3 - Using a sharp spade or folding garden saw, cut the crown into large pieces where the fans naturally separate.
Step 4 - Gently tease the pieces of crown apart, keeping as many of the roots attached as possible.
Step 5 - Replant the new plants in prepared holes in the garden.
Step 6 - Plant any remaining divisions in pots big enough to accommodate the roots, and fill any gaps with an all-purpose potting mix.
Step 7 - Water newly planted divisions well, and place any potted plants in a sheltered location in part shade until ready to use.
Caring For Young Daylilies
Newly transplanted divisions require supplemental watering until they have fully established in their new home. When new foliage grows, the plant has established a good root system to support top growth. Potted divisions can be grown in a semi-shaded location for a season or more. Keep the pots well watered and check for annual weeds and slug and snail damage regularly.
When growing daylilies from seed, avoid planting out the seedlings too soon in the landscape. Instead, transplant small seedlings into individual grow cells in a flat or in 4-6-inch pots. Place the pots in a sheltered location where they will receive sun early in the day or late in the afternoon. Keep the seedlings watered well, letting the soil dry slightly between waterings. Once the seedlings have reached a manageable size, plant them in the ground in early summer so they have time to settle in before fall dormancy. Apply a slow-release fertilizer at the time of planting according to the manufacturer's recommendation.
 |
Author Robbin Small - Published 12-06-2023 |
